How to Make a Strawberry Crunch Cake Recipe at Home
Table of Contents
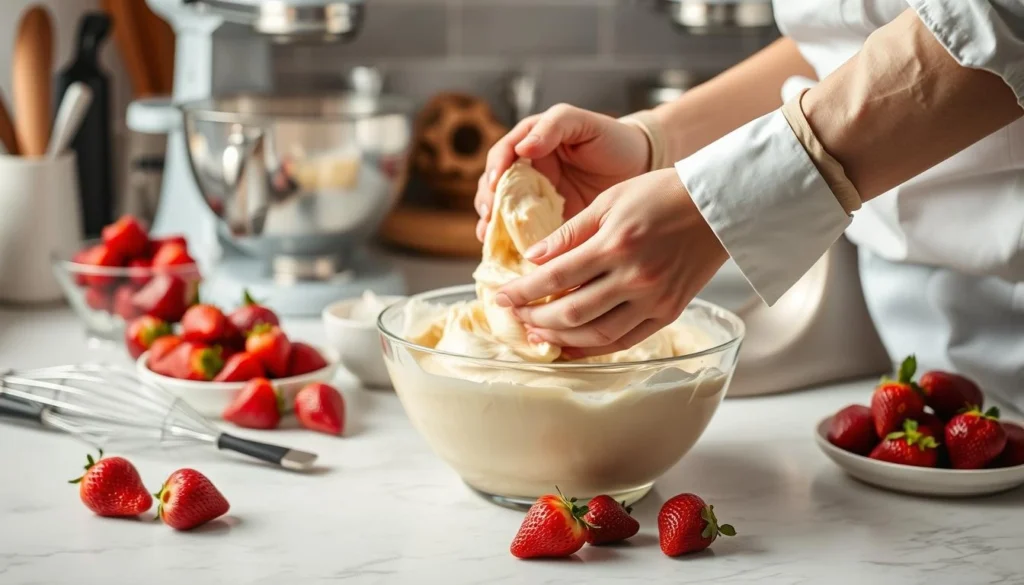
There’s something magical about recreating a beloved dessert in your own kitchen. It’s not just about the flavors—it’s about the memories and joy it brings. If you’ve ever craved the nostalgic taste of a classic summer treat, this strawberry crunch cake recipe is for you. Imagine a soft, moist base topped with creamy vanilla frosting and a crunchy, golden topping that adds the perfect texture. It’s a dessert that feels like a warm hug from your childhood.
This homemade version is inspired by those iconic ice cream bars many of us grew up loving. It’s simple to make, yet it delivers a show-stopping result that’s perfect for gatherings or just treating yourself. With a mix of fresh ingredients and a little creativity, you’ll transform your kitchen into a summer dessert haven. Let’s walk through the steps to make this delicious treat!
Introduction: The Perfect Strawberry Crunch Cake Experience
Bringing a nostalgic dessert to life in your kitchen is an experience like no other. The anticipation of mixing, baking, and assembling this treat is half the fun. Whether you’re an experienced baker or just starting out, this strawberry crunch cake recipe strikes the perfect balance between ease and imagination. It’s a delightful way to revisit childhood memories while making new ones.
The magic is in the blend of tender, moist layers, rich creamy frosting, and a crisp, golden topping. Every bite offers a perfect balance of textures and flavors. You’ll need a few key ingredients like cake mix, strawberry jello, and crisp toppings to achieve this iconic dessert. High-quality tools, such as a reliable mixer and a 9×13 baking pan, ensure the best results.
Cake, Frosting, and Topping Ingredients
To make this dessert, you’ll need a combination of fresh ingredients and pantry staples. The base can be made from scratch or using a boxed mix for convenience. Strawberry jello adds a burst of flavor, while the crunch comes from a blend of crushed cookies and melted butter. The creamy frosting ties everything together, making it irresistible.
Essential Kitchen Equipment
Using the right tools makes the process easier and more enjoyable. An electric mixer ensures your batter and frosting are perfectly smooth. A 9×13 baking pan is ideal for even baking, while a sturdy spatula helps with assembly. These essentials guarantee a professional-looking result, even for beginners.
This strawberry crunch cake recipe is versatile, making it perfect for celebrations or a sweet treat any day of the week. Whether you stick to the classic version or add your twist, the outcome is always delightful. Let’s dive into the ingredients and tools you’ll need to get started!
strawberry crunch cake recipe Ingredients Overview and Must-Have Tools
The key to a perfect dessert lies in the ingredients and tools you use. Whether you’re baking for a special occasion or a simple treat, having the right components ensures success. Let’s break down what you’ll need to create this delightful dessert.
Cake, Frosting, and Topping Ingredients
To achieve the perfect balance of flavors and textures, you’ll need a mix of fresh and pantry staples. Here’s a detailed list:
- Cake Base: Use a boxed mix for convenience or make it from scratch with all-purpose flour, granulated sugar, and eggs. Add a hint of vanilla extract for depth.
- Frosting: Combine unsalted butter, powdered sugar, and heavy cream for a smooth, creamy finish. A touch of vanilla enhances the flavor.
- Topping: Crush Nilla Wafers and mix with melted butter. Sprinkle in freeze-dried strawberries for a pop of color and a burst of flavor.
Quality ingredients, like fresh strawberries and reliable brands, ensure the best results. Precise measurements are crucial for the perfect texture.
Essential Kitchen Equipment
Having the proper tools helps make the process easier and more fun. Here’s what you’ll need:
- Mixer: An electric mixer ensures your batter and frosting are perfectly smooth.
- Baking Pans: Use 8-inch round pans for even baking and easy layering.
- Measuring Tools: Accurate cups and spoons are essential for precise ingredient amounts.
- Decorating Tools: A spatula and piping bag help with assembling and finishing touches.
With these ingredients and tools, you’re ready to create a dessert that’s both delicious and visually stunning. Let’s move on to the next steps!
Step-by-Step Strawberry Crunch Cake Recipe
Mastering a homemade dessert is a rewarding journey that combines creativity and precision. Follow these detailed steps to create a layered treat that’s as beautiful as it is delicious. From preheating your oven to the final assembly, every step matters.
Baking Instructions with Timing and Temperature
Start by preheating your oven to 350°F. This ensures even baking and a perfect texture. While the oven heats, prepare your pan by coating it with non-stick spray or a light dusting of flour. This prevents sticking and makes cleanup easier.
Next, gather your ingredients. Ensure your eggs and butter are at room temperature for smooth mixing. In a large bowl, beat the butter and sugar together until the mixture is light and fluffy. This step is crucial for a tender crumb.
Add the eggs one at a time, beating well after each addition. Gradually mix in the dry ingredients, alternating with the wet ingredients. This method prevents overmixing and ensures a smooth batter. Pour the batter into the prepared pan and smooth it out evenly.
Bake for 20–25 minutes, or until a toothpick inserted in the center comes out clean. Watch the time carefully to prevent overbaking. Once baked, allow the layers to cool completely before assembling.
Decoration and Assembly Tips
Once your layers are cool, it’s time to assemble your dessert. Place the first layer on a serving plate and spread a generous amount of frosting evenly. Add the second layer and repeat, ensuring the frosting is smooth and even.
For the finishing touch, sprinkle the crunchy topping over the frosting. Press it gently to ensure it adheres. Use a spatula to smooth the sides and create a polished look. For added flair, pipe extra frosting around the edges or top with fresh fruit.
With these steps, you’ll create a dessert that’s both visually stunning and irresistibly delicious. Enjoy the process and savor the results!
Mixing Techniques and Batter Tips
Perfecting your baking skills starts with mastering the basics of mixing and batter preparation. The way you combine ingredients can make or break your dessert. From achieving the right consistency to understanding the role of temperature, these tips will help you create a flawless batter every time.
Achieving the Perfect Batter Consistency
Begin by creaming together unsalted butter and sugar until the mixture is light and creamy. This process, known as creaming, incorporates air into the batter, resulting in a tender crumb. Use medium speed on your mixer for 3-4 minutes for optimal results.
Slowly add the eggs one at a time, mixing thoroughly after each one. This ensures the batter is stable and airy. Overmixing can lead to a dense texture, so stop once the ingredients are just combined.
When adding dry ingredients, alternate with wet ones. This prevents overmixing and maintains a smooth consistency. Gently fold in any remaining flour using a spatula.
Importance of Room Temperature Ingredients
Using ingredients at room temperature is essential for achieving a smooth batter. Cold butter or eggs can cause the mixture to curdle, while room temperature components blend seamlessly. Take your butter and eggs out of the fridge 30 minutes before baking.
If you’re short on time, place eggs in a bowl of warm water for 10-15 minutes. For butter, cut it into small pieces to speed up the warming process. This small step ensures your batter is consistent and easy to work with.
| Ingredient | Room Temperature Tip |
| Butter | Cut into small pieces and let sit for 15 minutes. |
| Eggs | Soak in warm water for 10-15 minutes. |
| Milk | Microwave for 10 seconds to remove chill. |
By following these techniques, you’ll create a batter that’s smooth, airy, and ready to bake into a delicious dessert. Happy baking!
Baking and Cooling the Cake
Achieving the perfect bake requires attention to detail and a few essential techniques. Start by preheating your oven to 350°F and preparing your 9×13 pan with non-stick spray. This ensures even baking and prevents sticking.
Once your batter is ready, pour it into the pan and spread it evenly. Bake for 25–30 minutes, or until a toothpick inserted in the center comes out clean. Try not to open the oven door too frequently, as it can lead to uneven baking.
Monitoring Cake Doneness
Testing for doneness is a critical step. Use a toothpick or skewer to check the center of the baked dessert. If the toothpick comes out clean or with a few crumbs, strawberry crunch cake recipe is done. Visual cues, like a golden-brown top and edges pulling away from the pan, also indicate it’s done.
Overbaking can result in a dry texture, so be sure to watch the timer closely. If you’re unsure, err on the side of slightly underbaking, as the residual heat will continue cooking it slightly.
Cooling for Perfect Frosting
After baking, let the layers cool in the pan for 10 minutes. Next, transfer them to a wire rack and let them cool completely. This step is crucial for safe and effective frosting application. A warm base can cause the frosting to melt or slide off.
Allow at least one hour for cooling. If you’re in a hurry, you can place the layers in the fridge for 15-20 minutes. Just ensure they’re at room temperature before adding the frosting.
- Use a toothpick to test doneness accurately.
- Cool layers completely to prevent frosting mishaps.
- Avoid overbaking by monitoring the timer closely.
By following these steps, you’ll ensure your dessert is perfectly baked and ready for the finishing touches. Happy baking!
Creating the Luscious Frosting and Crunch Topping
The frosting and topping are the finishing touches that make your dessert unforgettable. Whether you prefer a classic buttercream or a tangy cream cheese frosting, the process is simple and rewarding. Pair it with a crunchy topping for a perfect balance of textures.
Preparing the Creamy Frosting
Start with room temperature butter to ensure a smooth consistency. In a large bowl, beat the butter until it becomes smooth and creamy. Gradually add powdered sugar, mixing on low speed to avoid a mess. Once everything is combined, increase the speed and beat until the mixture is light and fluffy.
For a deeper, richer flavor, consider using cream cheese frosting. Place room temperature cream cheese and butter in a mixing bowl and combine them. Add powdered sugar and vanilla extract, then beat until smooth. This alternative adds a tangy twist to your dessert.
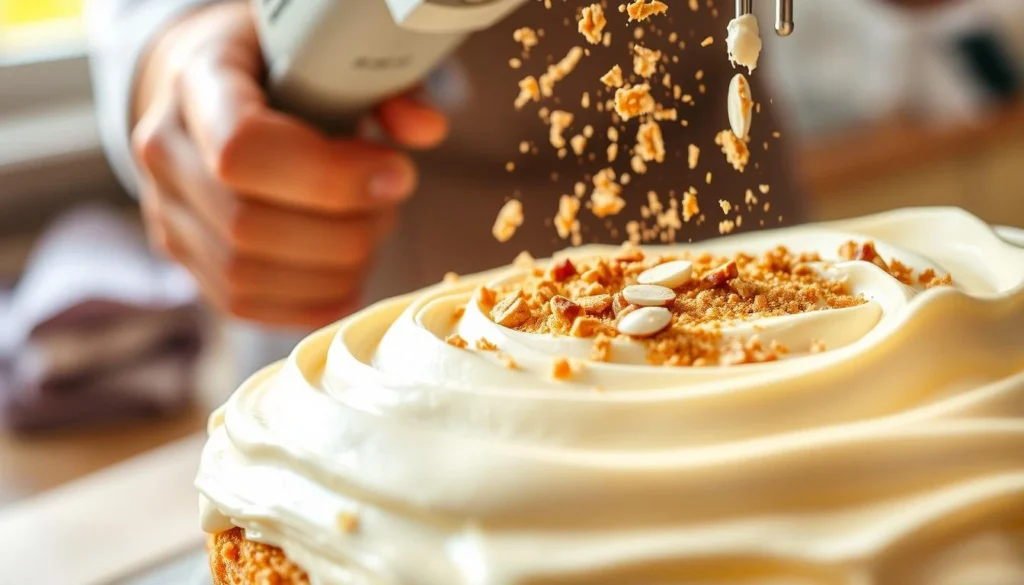
Crafting the Crunch Topping
For the topping, finely crush 33 Golden Oreo cookies into crumbs. Transfer to a mixing bowl and add 1/2 cup of melted butter. Mix until the crumbs are evenly coated. For a burst of flavor, incorporate 1/4 cup of freeze-dried strawberries.
Spread the topping evenly over the frosting. Use a spatula to press it gently, ensuring it adheres well. This step adds both texture and visual appeal to your dessert.
| Ingredient | Measurement |
| Butter (for frosting) | 1 cup (room temperature) |
| Powdered Sugar | 4 cups |
| Golden Oreo Cookies | 33 |
| Melted Butter | 1/2 cup |
| Freeze-Dried Strawberries | 1/4 cup |
By following these steps, you’ll create a dessert that’s as beautiful as it is delicious. The combination of creamy frosting and crunchy topping will leave everyone asking for seconds.
Recipe Variations and Time-Saving Alternatives
Making a dessert doesn’t have to be time-consuming or complicated. With a few smart shortcuts, you can create a delicious treat that still feels special. Whether you’re short on time or just want to simplify the process, these variations will help you achieve a tasty result without sacrificing flavor.
Shortcut Methods and Boxed Mix Options
Using a boxed mix is a great way to save time. Simply follow the instructions on the package, adding water, oil, and eggs as needed. Bake at 350°F until a toothpick comes clean. This method cuts prep time to just 40 minutes, leaving you more time to focus on the finishing touches.
For the frosting, store-bought options work well. Look for a creamy vanilla or cream cheese frosting to pair with your dessert. While the flavor may differ slightly from homemade, the crunchy topping made from scratch will still steal the show.
To make the topping, crush 33 Golden Oreo cookies and mix with melted butter. Add freeze-dried strawberries for a burst of flavor. This step takes just 10 minutes but adds a unique texture that elevates the entire dessert.
If you’re hosting a gathering, consider preparing the ingredients in advance. Measure out the dry components and store them in airtight containers. This way, you can assemble the dessert quickly when it’s time to serve.
For a fun twist, try adapting the strawberry crunch cake recipe for different occasions. Use a chocolate cake mix for a richer flavor or add sprinkles to the topping for a festive touch. These small changes keep the dessert fresh and exciting.
Whether you’re baking for a party or just treating yourself, these shortcuts ensure a high-quality result. The combination of convenience and creativity makes this dessert a go-to for any occasion.
Storing and Serving Your Strawberry Dessert Masterpiece
Proper storage and presentation can take your dessert from good to truly unforgettable. Whether you’re preparing it in advance or serving it fresh, these tips ensure every bite is as delightful as the first. From maintaining the topping’s crunch to creative serving ideas, here’s how to make your dessert shine.
Proper Storage Methods to Maintain Crunch
To keep your dessert fresh, store it in an airtight container. It stays fresh at room temperature for up to 3 days. For extended storage, refrigerate it for up to 5 days. Add the topping just before serving to preserve its texture.
If you’re making it ahead, bake the base and prepare the frosting separately. Assemble the layers and add the crunchy topping right before serving. This ensures the topping stays crisp and flavorful.
Creative Serving Suggestions
Presentation plays a crucial role in making your dessert stand out. Serve it with a drizzle of milk or a dollop of whipped cream for added richness. For a festive touch, garnish with fresh fruit or a sprinkle of crushed Golden Oreo cookies.
For gatherings, cut the dessert into bite-sized pieces and arrange them on a platter. This makes it convenient for guests to enjoy without needing any utensils. Serve it with a scoop of ice cream for an indulgent dessert.
| Storage Method | Duration | Tips |
| Room Temperature | Up to 3 days | Keep in an airtight container. |
| Refrigeration | Up to 5 days | Add topping before serving. |
| Freezing | Up to 2 months | Wrap tightly in plastic wrap. |
By following these storage and serving tips, you’ll ensure your dessert remains fresh, flavorful, and visually appealing. Whether it’s for a party or a personal treat, these steps guarantee a memorable experience.
Conclusion
Creating a homemade treat that combines creamy frosting and a golden top is a rewarding experience. From preparing the smooth batter to crafting the perfect mixture for the topping, each step is designed to be simple yet effective. The result is a dessert that’s both visually stunning and delicious.
By following this detailed guide, you’ll achieve a dessert that balances textures and flavors perfectly. Feel free to experiment with variations, like using powdered sugar for a sweeter touch or adding fresh strawberry for a burst of color. The core elements—creamy frosting and a crunchy topping—ensure a delightful outcome every time.
Share your creation with friends and family, and enjoy the joy it brings. This treat isn’t just a dessert; it’s a way to relive nostalgic memories while creating new ones. Happy baking!
FAQ
What ingredients do I need for the frosting and topping?
For the frosting, you’ll need unsalted butter, powdered sugar, vanilla extract, and milk. The topping requires Golden Oreo cookies, melted butter, and freeze-dried fruit for that signature texture.
Can I use a boxed mix to save time?
Yes, a boxed vanilla or yellow mix works well as a shortcut. Just follow the instructions on the box and add your homemade frosting and topping for a personalized touch.
How can I tell if strawberry crunch cake recipe is fully baked?
Insert a toothpick into the center. If the toothpick comes out clean, your dessert is done. Baking typically takes 25-30 minutes at 350°F (175°C).
Why is it important to use room temperature ingredients?
Room temperature butter and eggs blend more smoothly, creating a consistent batter. This ensures a light and fluffy texture in your final product.
How can I store this dessert to keep the topping crunchy?
Keep it in an airtight container at room temperature for up to two days. For longer storage, refrigerate it, but let it sit at room temperature before serving to restore the crunch.
Can I substitute fresh fruit for freeze-dried in the topping?
Freeze-dried fruit works best for the topping because it adds flavor without moisture. Fresh fruit may soften the texture, so it’s not recommended for this step.
What’s the best way to assemble the layers?
Start with a cooled base, spread a generous layer of frosting, and sprinkle the topping evenly. Repeat for additional layers, finishing with a final dusting of the crunchy mixture.
Can I make this dessert ahead of time?
Yes, you can bake the base and prepare the frosting and topping a day in advance. Put it together just before serving to preserve the texture.