Easy Strawberry Filling Recipe for Any Cake
Table of Contents
Have you ever wanted to elevate your dessert game with a homemade touch? Imagine the joy of slicing into a cake and revealing a luscious, vibrant layer of fruit filling that you made yourself. This recipe is your gateway to creating a professional-quality dessert that will impress everyone at the table.
Using simple ingredients like cornstarch, sugar, and fresh or frozen fruit, this strawberry filling comes together in just a few minutes. Whether you’re preparing a special occasion cake or just indulging in a sweet treat, this strawberry filling ensures a smooth, flavorful result every time.
With a total time of 45 minutes, including prep and cook time, this strawberry filling is designed for efficiency. You’ll learn how to balance the sweetness and texture perfectly, making it a versatile addition to any dessert. Ready to get started? Let’s dive into the details.
Introduction to This Easy Strawberry Filling Recipe
Transforming simple ingredients into a gourmet treat is easier than you think. This strawberry filling combines fresh fruit, sugar, and a touch of lemon juice to create a vibrant addition to your desserts. The result is a smooth, luxurious texture that elevates any cake or pastry.
The Appeal of Homemade Strawberry Filling
There’s a unique charm to making your own fruit additions. Unlike store-bought options, homemade versions allow you to control the sweetness and texture. The bright, fruity flavor pairs perfectly with a hint of tang from lemon juice, making it versatile for both desserts and breakfast treats.
The process is straightforward. Mix cornstarch with water to make a slurry, then cook it together with the sugar and fruit. This method ensures a thick, glossy consistency that’s perfect for layering or drizzling.
Why This Recipe Works for Any Occasion
This strawberry filling is designed for versatility. Whether you’re preparing a cake for a celebration or a quick dessert for a weeknight treat, it fits seamlessly. The ingredients are basic, and the instructions are straightforward, making it suitable for bakers of any skill level.
“The charm of this strawberry filling is in its simplicity. It’s a quick way to add a homemade touch to any dessert.”
From dinner parties to everyday indulgences, this fruit addition brings a touch of elegance to your table. Plus, it stores well in the refrigerator, so you can prepare it ahead of time.
Ingredients and Preparation
Crafting a delicious fruit addition for your desserts starts with the right ingredients. This strawberry filling relies on simple, high-quality components to ensure a smooth and flavorful result. Let’s break down what you’ll need and how to prepare it efficiently.
Essential Ingredients and Measurements
To create this versatile cake filling, gather the following:
- 1 cup water: Acts as the base for the mixture.
- 3 tablespoons cornstarch: Thickens the mixture to the perfect consistency.
- 2 ½ cups fruit: Use fresh or properly thawed frozen options for the best flavor.
- ¾ cup white sugar: Balances the natural tartness of the fruit.
- 1 tablespoon lemon juice: Adds a hint of tang to enhance the overall taste.
Prep Time, Cook Time, and Yield Details
This strawberry filling is designed for efficiency, with a total time of just 15 minutes. Here’s the breakdown:
- Prep Time: 5 minutes. Measure and prepare all ingredients before starting.
- Cook Time: 10 minutes. Combine and heat the mixture until it thickens.
- Yield: Approximately 3 to 3 ½ cups, ideal for 28 servings.
For the best results, use precise measurements and follow the steps carefully. This ensures a smooth, glossy texture that’s perfect for layering or drizzling.
Step-by-Step Cooking Process
Mastering the art of homemade dessert additions is simpler than you might imagine. This guide walks you through each step to create a smooth and flavorful layer for your cakes. With just a few ingredients and a little time, you’ll achieve professional-quality results.
Creating the Cornstarch Slurry
Start by whisking 1 cup of water with 3 tablespoons of cornstarch in a large saucepan. This mixture, known as a slurry, ensures your dessert layer thickens evenly. Stir until the cornstarch dissolves completely to avoid lumps.
Combining Strawberries, Sugar, and Water
Add 2 ½ cups of prepared fruit and ¾ cup of sugar to the slurry. The sugar balances the natural tartness, while the fruit provides a vibrant flavor. Stir gently to combine all ingredients before turning on the heat.
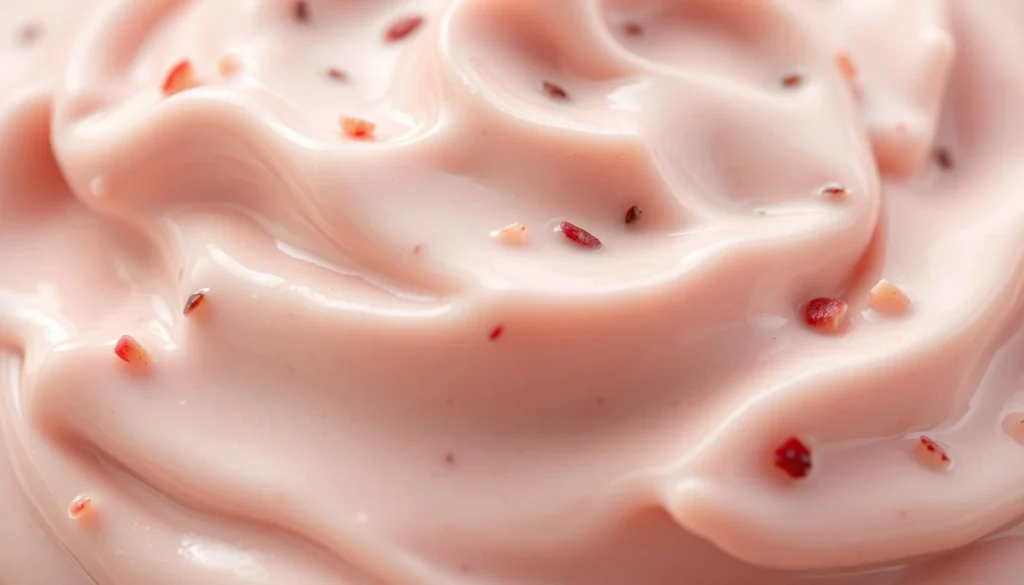
Cooking, Cooling, and Achieving the Perfect Consistency
Cook the mixture over medium heat for about 10 minutes, stirring continuously. This prevents sticking and ensures even thickening. Once the mixture reaches a glossy, thick consistency, remove it from the heat and let it cool completely. Cooling further thickens the layer, making it perfect for spreading.
Essential Strawberry Filling Tips and Tricks
Perfecting your dessert with a homemade touch requires a few expert tips. These insights will help you avoid common mistakes and elevate your final result. Let’s dive into the details to ensure your creation is flawless.
Preventing Burnt Sugar and Overcooking
One of the most common issues when making dessert additions is burnt sugar. To avoid this, always maintain medium heat during cooking. High heat can cause the natural sugars to caramelize too quickly, leading to a bitter taste.
Stirring frequently is another key step. This ensures the mixture cooks evenly and prevents hotspots that can lead to overcooking. Consistent attention during the process guarantees a smooth, glossy texture.
Enhancing Flavor with Lemon Juice and Zest
A splash of lemon juice added near the end of cooking can help balance the sweetness. The tangy flavor complements the natural fruitiness, creating a more complex taste profile. For an extra layer of flavor, consider incorporating a bit of lemon zest.
This simple addition not only enhances the taste but also adds a refreshing twist. It’s a simple touch that has a big impact on the final result.
| Tip | Benefit |
| Maintain medium heat | Prevents burnt sugar and ensures even cooking |
| Stir frequently | Avoids hotspots and overcooking |
| Add lemon juice | Balances sweetness and enhances flavor |
| Incorporate lemon zest | Adds a refreshing twist to the taste |
By following these tips, you’ll achieve a consistently smooth and flavorful result. Whether you’re a beginner or an experienced baker, these insights will help you create a professional-quality dessert addition every time.
Creative Ways to Enjoy Your Strawberry Filling
Want to find ways to make your desserts truly shine? This versatile recipe has you covered. Whether you’re baking a cake or whipping up breakfast, this addition brings a burst of flavor to every dish. Let’s explore some creative ideas to make the most of it.
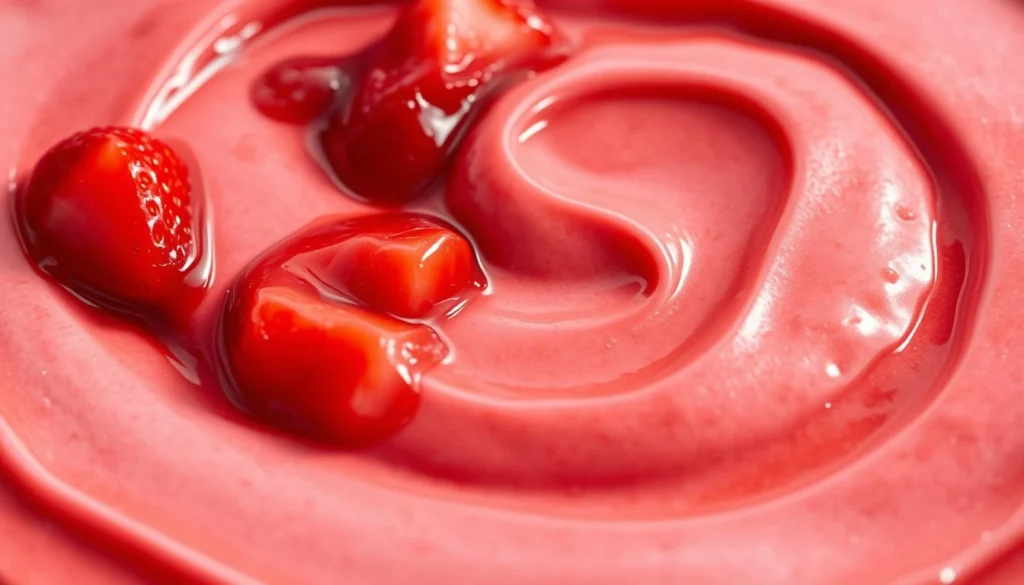
Using It as a Cake Filling or Topping
This strawberry filling shines as a cake filling, adding a vibrant layer to your creations. Spread it between cake layers for a stunning visual and delicious taste. It’s also perfect as a topping for cupcakes or cheesecakes, giving them a gourmet touch.
For a quick dessert, drizzle it over a plain cake or use it to decorate a trifle. The glossy texture and balanced sweetness make it a crowd-pleaser for any occasion.
Dessert and Breakfast Inspirations
This strawberry filling isn’t just for cakes. Use it to elevate your breakfast game by drizzling it over pancakes, waffles, or French toast. The fruity flavor pairs perfectly with morning favorites, turning them into a special treat.
For a refreshing dessert, swirl it into yogurt or use it as a topping for ice cream. You can even layer it in parfaits or mix it into smoothies for an extra burst of flavor. The possibilities are endless.
“This recipe is a game-changer for both dessert and breakfast dishes. It’s versatile, easy to make, and always delicious.”
With its balanced sweetness and slight tang from lemon juice, this addition complements a wide range of dishes. Whether you’re hosting a party or enjoying a quiet morning, it’s the perfect way to add a homemade touch.
Conclusion
Creating a standout dessert doesn’t have to be complicated. With just a few simple ingredients and clear instructions, you can make a cake addition that’s both flavorful and versatile. From preparation to presentation, this recipe ensures a smooth, glossy texture every time.
Remember to balance sweetness with a hint of tang from lemon juice for a more complex flavor. Whether you’re layering it in a cake or drizzling it over breakfast treats, this addition is sure to impress.
With a total time of just 15 minutes, this recipe is perfect for any occasion. Experiment with it and adapt it to your favorite desserts. A perfect, homemade touch is now within your reach.
FAQ
Can I use frozen strawberries for this recipe?
Yes, frozen strawberries work well. Just thaw and drain them before use to avoid excess liquid.
How long does it take to make this dessert topping?
The process takes about 15 minutes of prep and 10 minutes of cooking, plus cooling time.
Can I adjust the sweetness of the mixture?
Absolutely. You can reduce or increase the sugar based on your preference or the natural sweetness of the fruit.
What can I use this sauce for besides cakes?
It’s versatile! Try it on cheesecake, ice cream, pancakes, or even as a dip for fresh fruit.
How do I store leftovers?
Store it in an airtight container in the refrigerator for up to 5 days. Reheat gently before use if needed.
Can I make this recipe ahead of time?
Yes, it’s perfect for prepping in advance. Just cool completely and store it properly until ready to use.
What’s the role of cornstarch in this recipe?
Cornstarch acts as a thickener, giving the sauce its smooth, glossy consistency.
Is this recipe suitable for a low-calorie diet?
While it’s naturally sweetened with fruit, you can reduce sugar or use a sugar substitute for a lighter version.
Can I add other fruits to this mixture?
Definitely! Raspberries, blueberries, or a mix of berries can create a unique and delicious twist.
How do I prevent the sugar from burning?
Cook over medium heat and stir constantly to ensure even cooking and avoid scorching.